Thursday, March 27, 2014

[Mod] Swarmfire AR Delete and Flow Improvement

This is news from 2011, but I figured I would post some of the details of proper AR removal and a no-brainer flow fix for the Swarmy since these items are one of those things. You know, always overlooked, sometimes dismissed, sometimes misunderstood.


Start with the PT/AR/cylinder seal assembly. Note that the seal plate is a sort of cap, which is fit into a socket on the PT sort of like a pipe fitting. It is glued with CA glue.

Now, instinct may tell some of you to apply heat. Don't do that. No boiling. Too much risk of warping the seal plate or weakening the glue under the gasket.

Find a knife with a suitably thin and pointed blade (I use my old Swiss Army knife) and very carefully work around the entire circumference of the seal head until it can be broken loose. Try not to crack, damage or expand the socket too much.


Remove and discard the AR poppet and spring.


And here you have the seal plate. Note that the ports are almost entirely occluded by a plastic web that was used to guide the AR poppet "fingers".

And this is the most critical step, which is painfully obvious but frequently omitted for no discernable reason: Remove the webbing from the ports all the way to the edges. It is of absolute importance that you do not damage the black EVA foam gasket, or the underlying plastic of the seal plate, while doing this!
 
That's better.

Now, you must reinstall the seal plate on the PT. I use Devcon here, of course, but this is a low stress job and anything that can fill gaps and seal the assembly will work. Orient it correctly (match the oblong vent hole on the seal plate and the PT socket) and glue it in, making sure it is fully seated and the vent hole is plugged completely. Wipe all excess adhesive off the exterior and let cure.


Now you can test the cylinder seal install for leaks. Find the plunger, take the O-ring off, clean everything meticulously as if you were doing regular maintenance on the gun, reinstall and lube up the O-ring. I recommend white lithium grease for this seal. Run it in and out of the PT a few times to distribute the lubricant.

Note that you should NEVER put anything under the O-ring in an effort to "improve" the seal, and unless the ring is worn out, you do not need a new one.

Now you can press the seal head firmly against a smooth flat surface and give the plunger a quick push down (quick, so as to seat the floating O-ring seal). It should hit springy pneumatic resistance and if you keep pushing on it, nothing should be hissing and it shouldn't be rapidly collapsing. There should be practically zero friction from the O-ring seal. If you do not have trouble to chase here, you can proceed with the rest of the Swarmfire build. Be sure to consider the reliability mods particularly if you are going to run a high ROF or are an HvZ player, and select a worthwhile spring such as the OMW 8 kg.

Don't forget to NEVER install a plunger impact pad on Swarmfires, since the plunger does not impact the PT. The plunger's travel is stopped by the lug on the rear end of the rod and its matching track in the receiver. Most attempts (i.e. SGNerf et al.) at Swarmfire impact pads most likely don't do anything because the pad never touches the PT. If you use a thick enough pad to hit the PT at any point (like I did as a noob), you will cause major reliability problems, since the PT is free to travel forward and push on the cylinder causing excessive friction.

Wednesday, March 26, 2014

[Tech] The Devcon Tenets: Methacrylate plastic welding adhesives

There are very few tools and materials that have reached the level of "indispensable" for my work in this hobby, but one of the few on that list would have to be the methacrylate 2-part structural adhesives often known as "plastic welders", "plastic bonders" or "Devcon". These are a tool for the practical nerfsmith or structural plastics fabricator that I absolutely cannot overstate the utility of.

A general overview

Adhesives have a bad name in nerf. There have been far too many failures and flaky results over the years, but these are almost always caused by inept methods and simple use of the wrong tool for the job, not complete unsuitability of the entire class of adhesive assembly methods, which is extremely broad. Adhesive bonding and solvent welding, particularly of plastics, should never be counted out - and in some cases is indisputably superior, provided the correct methods and materials are involved.

Frequently "the job" in this hobby is:
  • To create an effective single unit from two or more pieces of a bondable plastic*
  • To bond a plastic to another material, such as a metal or a composite
* Bondable plastics include ABS, from which a great number of stock nerf gun parts are made; other styrene-based plastics such as PS, SAN, HIPS, etc. which are similar to ABS; PVC, which is frequently used as a cheap and mechanically high-performance material by hobbyists; polycarbonate; acrylic, and many others.

For these uses, methacrylates like "Devcon" should always be a consideration! They excel where others often fail.


A note on Devcon

Let's get this straight: Devcon is a company (ITW Devcon, Inc.) and a brand of adhesives and similar products. You can go here and check them out.

The company has a full line of hardware store 2-part adhesives branded "Devcon" that you may have seen, including many epoxies. But the term "Devcon" in the nerf hobby is almost ALWAYS referring to Devcon Plastic Welder and its relatives.


Shown here is its current retail packaging on the left and the older on the right, which you may have seen at some point. This product is available both at hardware stores and from more specialist suppliers (in which case the familiar old Devcon logo will still be used).

When Devcon... isn't Devcon

There are a number of competing and other brand products of this type in the hardware store market, including Permatex and other rebadges of the Devcon product (recognizable by the Devcon tube), but the most notable is Loctite's Plastic Bonder:

Note the presence of the term "epoxy" - long story short, it's wrong and is there for product recognition. We will get to that later. However, of special note is that the Loctite packaging for their Devcon PW knockoff is labeled "PLASTIC BONDER" and "Fuses Plastics". Beware a similar product without these markings, because that stuff is not methacrylate.

You may also buy MMA adhesives from industrial/specialty sources, in which case, do your homework on the manufacturer's website and use something appropriate. Devcon has a "Plastic Welder II" that may come in handy for applications involving nylon and other difficult plastics.


Performance characteristics, and comparison to epoxy adhesives

The main reason to use MMA adhesives rather than alternatives in nerf is inherent to the chemical constituents. Methyl methacrylate itself is a solvent for most bondable plastics. Thus, the terminology "weld" or "fuse" is not incorrect; significant fusion occurs when a MMA adhesive contacts a material like ABS or PVC. If you spill a little Devcon and try to scrape it off, the surface of the plastic will be softened, just like you may have noticed while using solvent cement to weld PVC piping systems together. The result of a Devcon joint is a weld, with a seamless transition from i.e. ABS into the cured acrylic resin of the adhesive.

This is in contrast to epoxies, which have no solvent property, create absolutely no fusion and function only as a glue producing a much weaker mechanical bond.

MMA's solvent properties also extend to surface contaminants. Combined with the lack of dependence on surface roughness to achieve "keying" (often emphasized by epoxy users as of prime importance) due to the solvent-welding action, MMA adhesives are very carefree to work with. I have made bonds between pieces of completely unprepared, 15 year old, oxidized PVC that had been sitting outside in the sun, and was unable to break them without failure of the material itself. That said, sanding is always cheap insurance and is necessary on metals and other materials that cannot be dissolved.

Epoxy, however, is very sensitive to prep and cleanliness. Oil, silicone residue from injection molding release agent, oxidation or even just a glossy ABS surface can make epoxy fall right off.


The second main advantage to the MMA "plastic welders" is the plastic-optimized mechanical properties. The cured resin, unlike most consumer epoxies, is a very tough and impact-resistant material and has similar characteristics to i.e. ABS and PVC; thus there is not a major modulus mismatch to create stresses in the bond, as occurs when you have rigid JB Weld (epoxy) or 5-minute epoxy in contact with ABS.


Wait. Plastic epoxy?

Confusion of 2-part methacrylates with epoxy is very common. Consumers will call any 2-part glue epoxy. Many nerfers have unwittingly called a methacrylate adhesive epoxy at some point, including noob me. Henkel/Loctite isn't helping. In fact, "epoxy" is used as a "product category" for 2-part adhesives by Loctite.

This is unfortunate, because it creates much confusion about the available adhesives and their performance.

So be aware of the difference. Epoxy and methacrylate resins are not chemically related in the slightest. Read the warning on the package - if it includes Contains methyl methacrylate and methacrylic acid or the like, this is the stuff you want. This is a surefire way to make sure you get the right stuff no matter what brand you use. Conversely, epoxies are always labeled with epoxy resin. That "non-Bonder" Loctite stuff, sure enough, contains epoxy resin, and not methyl methacrylate. Be a savvy buyer.


But there ARE gremlins!

What, you thought it really was a wonder material? Was I sounding like Billy Mays? Too good to be true?

Actually, there are only a few "gotchas" about MMA adhesives.

One is shelf life and environmental sensitivity. Epoxies store very well. You can use decades old epoxy. This is NOT true of methacrylates. Unlike epoxies, the resin is not a simple system of 2 monomers that react automatically on mixing, it involves a small amount of "activator" which triggers polymerization. This activator is sensitive to heat and ages rapidly, and as it degrades, the resin may cure slowly, not at all, or may not achieve its full properties.

As a result:
  • Devcon has a shelf life. Only buy as much Devcon as you think you may use soon. For most of you including me, that is ONE tube. Do NOT stock up. Do NOT buy from a store that never moves any product. Go to the busiest supplier you can find.
  • "Store in a cool dry place" is not a generic suggestion. Store Devcon AWAY from heat sources. A hot car is NOT the place for Devcon; I have had multiple tubes go bad from my toolbox being left in a car! Sometimes I put Devcon in the fridge.
  • ALWAYS test an unknown (stored, newly bought, etc.) tube of Devcon by mixing up a small batch BEFORE using it on a critical application! If it doesn't cure HARD within the manufacturer's specified cure time, be suspicious! If it doesn't cure hard within a few hours, it's a total loss, go get a new tube!
The second big "gotcha" is that some metals, such as copper, inhibit MMA curing. Do not use Devcon to glue brass tubing, as the bond will never achieve strength. This is an application where epoxy is a better choice. Steel and aluminum, however, are perfectly fine.

Also, MMA adhesives have a distinctive sharp acrylic odor (the smell of MMA vapor). I am used to it; the smell of Devcon is the smell of work getting done and impending zombie annihilation! However, ventilation is probably desired. You can really stink a place up with the stuff.


Miscellaneous usage considerations

"Plastic welder" is a 2-part adhesive - most nerfers are familiar with epoxy usage. Dispense the correct quantities as specified (usually equal volumes in consumer products) and mix very thoroughly, then apply to part to be bonded, assemble and let cure.

Some "dual syringe" tubes fail to dispense evenly. I usually cut the 2 plunger rods apart and operate each independently. MMA is not very sensitive to mix ratio variations; and these tubes usually don't measure any more accurately than "eyeballing" the quantities (in fact most end up way off), so you can save on wasted product from a malfunctioning tube by separating the plungers and estimating the correct ratio.

Most "plastic welders" have excellent gap fill characteristics.

As an alternative to solvent welding and thermal welding

Consider "plastic welder" if you were thinking of using either aforementioned processes.

Solvent welds are typically weaker than the base material because of voids/poor structure. True solvent welding involves a solvent that evaporates or diffuses away, so the joint shrinks. Pure solvents and almost-pure solvents like MEK, Weld-On 3, etc. have absolutely zero gap fill and require perfect fit and interference to bond parts. Even filled solvent cements (like PVC and ABS pipe cements) that contain added plastic resin will still shrink, create voids and fill gaps poorly as the solvent is present in the initial adhesive but not the final bond.

By contrast, MMA still achieves fusion but is 100% solids. It cures by polymerizing, not by evaporation of solvent, and doesn't change volume in the process.

Thermal welding without specialized equipment similarly creates a weak joint. Save your soldering iron tips for soldering and quit breathing ABS fumes. MMA adhesive will make a stronger result and is easier to use and add material to a joint with.

As an alternative to mechanical fasteners

"Mechanical fastening" is a buzzword, particularly in the Proper NIC, and is frequently listed as a feature: "No adhesives - 100% mechanically fastened" (specifically referring to cases where mechanical fasteners such as screws or bolts are used to replace an adhesive or weld rather than where removability is required). This is due to that previously discussed mistrust for adhesives and history of failures. Since epoxies are often regarded as the go-to structural adhesive in nerf and alternatives are infrequently encountered for applications like installing grips and integrations and doing structural mods and repairs, it is easy to see where the idea originates.

However, the idea that mechanical is superior is flawed. Often, a mechanical joining of two parts creates stress concentrations and the seamless bonded or welded part would be stronger, cheaper and cleaner - of course, given that a weak or incorrect adhesive or bad workmanship is not there to throw a wrench into the matter.

MMA "plastic welder" on ABS, PVC et al. is certainly an example of a proper adhesive selection, and one that can actually perform better than any mechanical fastening in some cases since a uniform area (rather than individual fasteners) applies forces to the material.

Example usage of MMA adhesives in nerf

Um, Read this blog? Everything I do... 90% chance the stuff is there! Some notable and some mundane examples below:

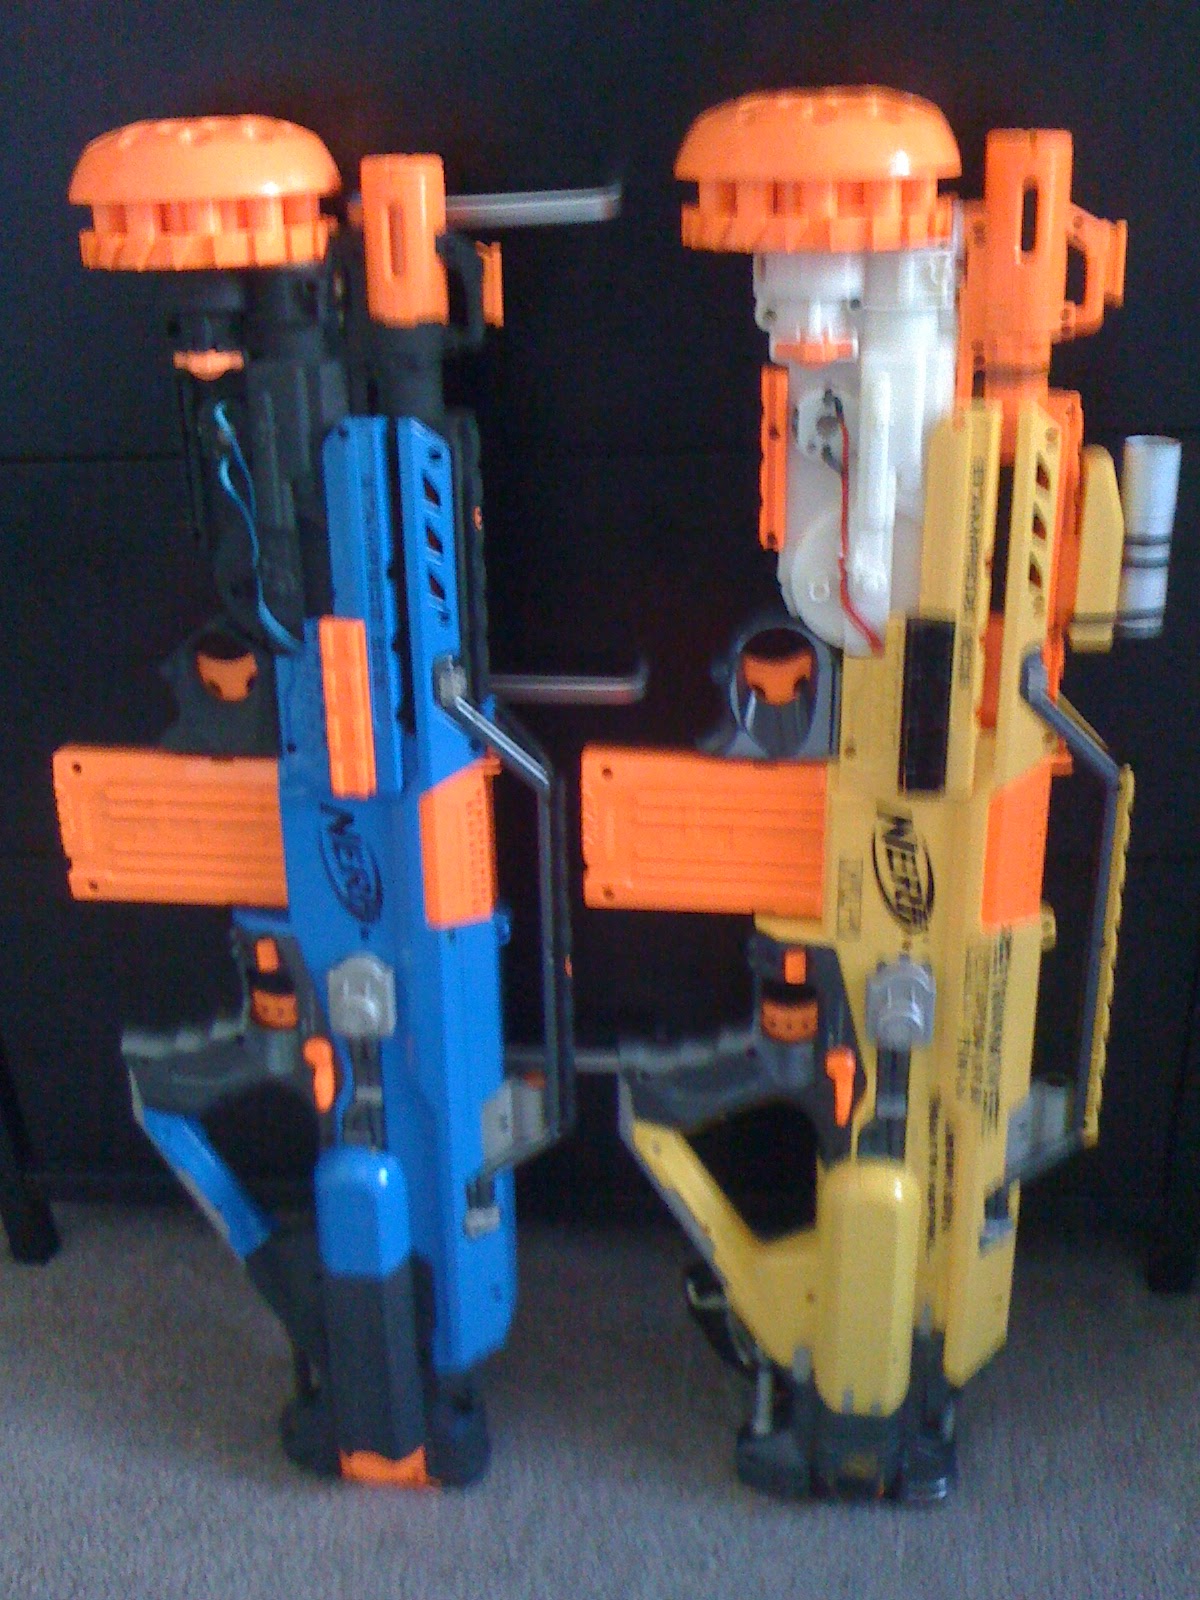
 "Lockheed Bot": Devcon was used to bond an aluminum bracket and a steel hinge half to an ABS nerf gun receiver after continual problems with failure of screws and bolts. Introduced me to the use of this material.


Stryfe Cyclone: Devcon was used to fabricate motor mounts and the custom stock.


Numerous underslung integrations: Devcon was used to bond ABS clamshells to produce barrel shroud/handguard sets with integrally mounted Swarmfires, Rapidstrikes and Roughcuts. All of these have minimal bond areas and are subjected to considerable mechanical abuse from gameplay.


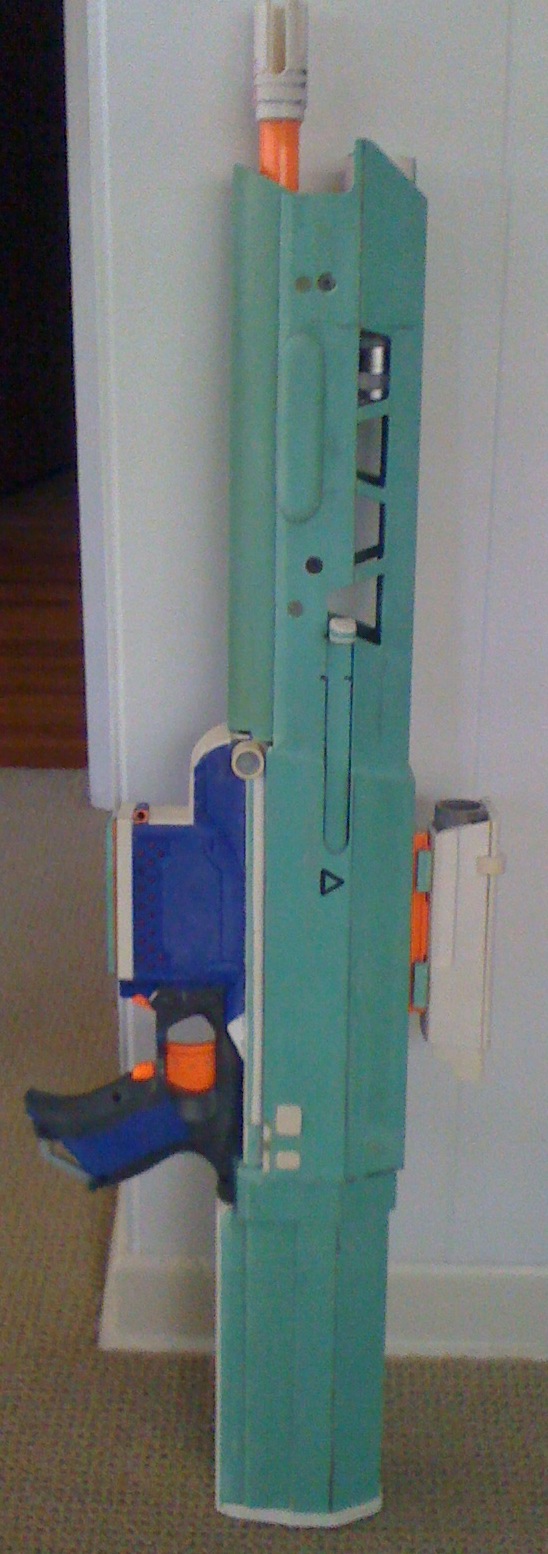
Oblivion Rifle: A Stryfe was structurally modified and fitted with scratchbuilt shrouds and other parts to create a prop replica. The materials were mainly PVC and ABS. All structural bonding, with very few exceptions, was with Devcon and Loctite Plastic Bonder.


RP Alpha Trooper: Devcon was used to bond a steel reinforcement to an ABS plunger tube. This application is subject to heavy shock and vibration that could crack or delaminate epoxy from the ABS. The part has been in service since mid 2011 without failure. Additionally, Devcon was used to repair and bond a reinforcing gusset to a cracked sear lug, which was initially stock, on this same PT at a later date.


Grips and trigger packs: Devcon has been used in many installations of integral pistol grips, trigger units and the like on clamshell host parts. This is a very failure prone application in many cases, since the bond area is small and the protruding grip offers much mechanical advantage when a gun is hit, fallen on, etc. This includes use on a circa 20lb (equipped and loaded) Vulcan.


Stampede BCG: Devcon was used to repair a busted-up bolt group and fabricate the destroyed endplate.
Countless others have been left out, but rest assured, if I did it, Devcon is holding it together. What is surprising even to myself is that despite all the abuse HvZ gear gets from me and others who use my work, not one of my Devcon joints has ever failed. Generally, if a structural failure is to occur, adjacent parent material will break long before anything happens to the Devcon bond line.

So if you don't use this stuff already, give it a shot. I guarantee it will change the way you build.

Friday, March 21, 2014

Rapid Upgrades and Rambles.

This last few days saw a lot of Rapidstrike tweaking.

Following the testing of the OMW Swarmfire spring, it was clear my RapidSwarm (my current stock class and HvZ workhorse) had to have it. Also, a fellow member of the squad proposed a hybrid type of grip design for a proper Swarmfire trigger/foregrip on these and requested that he finally get the recommended Swarmfire upgrade. Finally, I finally got the Rapid2 back. Finally. It had been loaned, along with a battery pack, to a player last game - so this was my first opportunity to install its new custom battery pack in the correct location.


Up first was the RapidSwarm.

Here is where design for service comes in handy. The entire front assembly, including the barrel shroud, inner barrel, flywheel cage, front sight and Swarmfire receiver are a lift-out module. No annoying workshop worthy procedure here.


Note that the mechanical modularity is inherent when you do the Swarmfire install properly. What isn't inherent is that this entire section of the wiring harness unplugs.

That is a wise decision for RS builders. It only takes a minimum of 3 pins (for front-wired or Swarmfire equipped guns) or 2 (rear-wired and non-underslung equipped) of power connectors of your choice to do the basic common builds. The magwell area has adequate room to place these connectors and secure the wire.

CT-0268 also had me install the VFG/trigger unit (mentioned below) on the original RapidSwarm's twin, but he elected to omit the connectors at build time to save pocket change worth of parts, resulting in a tedious Swarmfire upgrade and grip install.

And here's a nice visible example of flywheel buildup after a recent test of elite darts. A lot of nerfers know this rubbery stuff that accumulates on flywheels from high-speed, high-temperature contact with dart tips and foam.

But what continues to baffle me is that the default assumption is that this phenomenon is somehow a problem.

Flywheel buildup is a normal and functional part of high-end flywheel gun operation. Dart damage will drop off and velocities will increase significantly after a new clean flywheel set has developed its buildup layer.


Note that the buildup self-aligns to the assembly of the gun: cage to magwell alignment, flywheel axial position on the motor shafts... It's a lot more accurate than you are (without machine tools and overkill measurement methods). In fact, it almost forms a concave surface in this example, and at the very least, will correct for any taper of stock flywheels that is a usual suspect for accuracy problems.

So don't worry about it. Don't clean your flywheels. Don't apply stuff to them either. One, the gap is probably correct from the factory. Two, mark my words about Delrin objects rotating at high speed being a bad place for anything adhesive. It will shred. When? Who knows. Probably when you are about to get tagged.


The best way to get flywheels gripping better and running truer is to go to the range and burn ammo.
So, the spring was dumped into the Swarmfire, which was cleaned and lubed as always (anyone who tells you that putting "nerf" before "gun" somehow magically exempts you from maintenance requirements has never cleaned an HvZ gun and seen all the shit they collect!) and performed as expected. But we have had enough images of Swarmfire guts, you know what working on Swarmfires looks like.

I also modified a Swarmy cylinder retainer with a steel grip loop to allow quick cylinder dropping in the field (the idea is to tie the retainer to the gun with a piece of paracord or something so that the retainer can't get lost). That will not be implemented in combat. Not yet. Why? It's real dumb... I can't think of a sound way to carry the damn cylinders. They are an awkward device, and they have darts protruding that you don't want to dislodge or mangle. This calls for a specific piece of tac gear, a Swarmfire cylinder bandolier or a MOLLE Swarmfire cylinder pouch/clip or something.


So here's the VFG/trigger pack that CT-0268 devised, based on a Retaliator-type Nerf VFG (a common and often unwanted accessory) minus the junk railgrabber it comes with. The combination of a vertical grip with a trigger is odd. Reminiscent of an RPG launcher, perhaps. I would not have come up with that, and I recommended a real pistol grip, but it works.

His got a "stock" dual-contact switch salvaged from something Nerf, along with a Stampede magwell interlock button, which resembles a grip switch button when installed.


I was not to be one-upped, though. Sure, I did that work, but I wanted to go one step farther and upgrade to a microswitch and a proper ergonomic trigger.

I fabricated the trigger from PVC sheet, installed a steel pin for the trigger pivot and used the usual full size microswitch, with no lever actuator. The result is extremely crisp and has a very short pull. Just the ticket for my snappy new 90-100fps Swarmy and its higher amp draw...
 Here you can see the trigger/switch arrangement and how short the stroke is on that.

 And the trigger removed.

 And the trigger itself.


Ah yes. You should ALWAYS have a trigger guard.

Negligent discharges of these Swarmfires have been a major problem with the old side trigger system. Initially, CT-0268's gun did not have a guard on the new grip assembly, but a few days later it was clear I was not crazy to suggest a guard. I fabricated a guard on the spot with some PVC sheet heated over a stove burner and bent. Slammed it on with Devcon. Problem solved.

My install got the exact same guard from the start.
Now, in my case, there was a certain problem with the change to the foregrip trigger: I am a habitual mag gripper when I handle rifles, ever since the Stampede era, and find I can get the fastest sidewise engagement of a sudden target (such as a dodging zombie) by mag gripping my rifles. Keeps the mass (of the support hand and arm) pulled in tighter, less inertia to swing around. Thus I tend to shun VFGs and foregrips in general. My old side trigger rig could not go, it had to remain for snap reaction use, since I will not be using that VFG continuously.

So, it got a separate safety, solving the problem of Swarmy NDs and not being able to chuck the gun into a car trunk without it going off.

So here it is.


Up next: That stick battery install into the Rapid2.

This stock had already been prepped for a stick battery as covered a while back and I had also made the pack for it, a slightly shorter while back. It is a 2S, using the Sanyo UR18650SAX cell as all of my budget packs have.

(A note on the state of the big Li-ion changeover: It is a huge success, the packs are all troopers. I cannot understate how awesome being able to check state-of-charge with a voltmeter is. I also cannot understate how awesome the low self-discharge is. In the time since last game and following Worldfire events and other nonsense, many nickel packs of mine self-discharged, built up voltage depression and went out of balance, and had to be slow charged and cycled to get back in the game. Meanwhile, the 2S Li-ion from the loaned Rapid2 didn't even need a charge!)


All it took was a quick wrap with some sock material to provide some impact protection and stop rattling, and you would never know it's there. Light and unobtrusive.

"Where the hell is the battery for that thing?" 

Take that, Trustfire Brigade! Can't get a junk AA holder into here now, can we...

Unfortunately, with this choice of battery location and the particular way I implemented the stock, the RS has to split to access it, and that includes charging.

A spare female Deans and a balance tap extension tucked inside a tool-free access cover on the receiver would solve that VERY nicely. You don't want to charge lipos while they are installed in something, but these packs aren't lipos, and are about as safe as 3.7V chemistry Li-ion charging gets.

When I get around to it, I guess.

With the current motors in this unit and occasional use there is no big problem with battery life.

So on another note... Anyone remember this beast?

The Cyclone DMR.

That wss a time in my HvZ career where I had run several games with my trusty Swarmpede, and proven the rifle/Swarmfire deal was my stunning tool of choice... but I wanted to give a more civilized weapon a try. This was it: long-barreled, iron-sighted, semi-automatic, equipped with monstrous high-end motors and a flywheel configuration that works to defy the conventional logic of barrel length and flywheel accuracy, and it remains the sweetest handling nerf gun I am aware of.

Recently I brought it out to advertising and got some clean shots on zombies that my Rapidstrikes could never hope to match.

There is something to be said for that whole concept.

Don't get me wrong, I'm not going to full-scale-game this gun any time soon. But it still is just as good at what it does as I designed it to be, even today.

At least after I clean the sticky trigger.

Damn gremlins.

Wednesday, March 5, 2014

OMW Swarmfire 8 kg spring

I happened to pick up one of these springs on clearance while ordering some parts for HvZ business quite some time ago.


This is OMW's "2.5" (as in, 2.5 times the factory spring load, supposedly) offering for the Swarmfire. As usual with OMW spring products, it is a well finished spring, with perfectly square closed ends and shiny nickel plating.

This spring appears to be discontinued, though the reason for that is unknown. Perhaps low demand. Regardless, at the time of posting, stock remains.

The actual load of this spring does not seem in line with the 8 kg spec. Typically, OMW springs are rated with the force developed at the compression actually achieved in the intended application, and thus are underrated versus most commercial general-purpose springs and competitors' springs which are rated at full compression. This seems to be an exception. It certainly doesn't seem to have 2 kg more force fully compressed than, say, an OMW 6kg Stampede spring or a 5 kg DP spring.


Here are 3 common Swarmfire springs: a stock "orange trigger spec" Swarmfire spring (left), the OMW 8 kg (center) and a V2 Nitefinder spring (right). The OMW has the same free length as the stock spring.

OMW's performance claims for this spring are as follows:

With this 8kg spring, the Swarmfire can achieve 55 fps and shoot up to 45 feet flat.
All fps/range tests were conducted with the air restrictor removed and no other modifications.

I knew this made absolutely no sense for years - because I am getting substantially more velocity than that from the substantially weaker springs that I have been using. Lighter spring data for reference.

For this test I installed the spring in MASS-2 and hung it on my old Rayven. Like all my other Swarmfires, this one has an AR delete and seal plate flow improvement, cylinder peg removal, stock barrels, reliability fixes, etc. and is equipped with its original 360 motor.

In the name of science I should have conducted a peg test, and perhaps I should quantify the flow mod's effects, but the discrepancy here does not seem explainable from what I have seen of swarmfires in the real world that did not have either of these.


Let's see what the chrono has to say about it.

As usual, OMW highly underrates springs for velocity. The 8 kg spring punched out 90-100fps with elites and around 80 with 1.3g Sonics (Note that I am running very low on Sonic Micros, the test ammo is not new, and in the future tests are probably going to either switch to Buzzbee micros or phase out 1.3g darts entirely).

This is a better result than expected, for sure.

Now one concern that is likely to come up is the effect of springs of this load range on ROF. I video'd my Rapidstrike's Swarmfire (with my "old style" spring combo that I have used since 2011) and the MASS-1 with the OMW 8 kg being fired. The battery used in both cases was a 3S Sanyo pack that was resting at just under 12V prior to the test. I kept the ROF low to make any cyclic rate sag or response loss more apparent.


As you can see, it's no big deal in this case. The little 360 motor can pull this spring just fine and ROF holds up very well. Of course, this is contingent upon the use of a battery with sufficient current capability.

Monday, March 3, 2014

Elite Universal Suction Dart (12rds/Pack) initial tests

There has been quite a bit of buzz about this round already.


12 round card pack. Purchased from the Butler Plaza Target in Gainesville FL for $4.99. These are available in 12 round packs and 30 round standard cases like other New World Hasbro darts.


It is a Hasbro product that carries the N-Strike Elite brand, advertised to be compatible with any magazines that can handle Elite darts/Streamlines and positioned as an outright replacement for the old suction micro as well as for adding the whimsical suction tip capability to non-micro compatible guns.


The tip code is W.


Foam is as expected; standard Elite foam. The big Elite Standardization has made foam so boringly uniform between codes.


What a lot of nerfers are talking about is accuracy improvements and effective range. That will have to wait, though. External ballistics occur after the round has left the muzzle - so let's first deal with getting to that point. This first post will be similar to when I looked at the ZS Elite, with the tedious important stuff picked off tediously and the usual battery of bench tests. So here we go.


This is the new tip design.
Note that unlike older style Streamline and Elite domed tips which have the same diameter as the foam OD at the base, the USD tip is rebated quite a bit including the suction cup itself. This proves to be beneficial to magazine reliability. Far less rubber friction occurs than with conventional dome tips.


It also prevents squibs and erratic velocities from long barrels. Shown is a breech-loaded dart seen from the muzzle end of a Blue Line barrel, with the clearance between tip and bore quite apparent.

This is progress, Hasbro. I like this.

That said, long barrels and this dart are not a match made in heaven. The evidence and likely cause will be discussed after the chrono data link.


As shown here compared to a Standard Elite and a ZS Elite, the overall length of the USD is slightly greater, as is the foam length.

No magazine compatibility problems are expected, though. The length increase is approximately 1/16" and all N-Strike magazine systems have far more than enough allowance for round length.

However, the length increase vanishes with the suction cup compressed.


My theory is that the extra overall length is to compensate the suction cup flexibility and ensure reliable achievement of the full pushback distance on springers with barrel-in-bolt (BIB) breeches. On stock guns, this is a matter of opening the AR, so a serious performance concern.

As to pushback distance, I tested this with a Retaliator which is a decent representative of the newer style (swinging door) system in Hasbro guns.

 A ZombieStrike Elite was used as the control...

 ...the action was brought almost into battery past the point where the pushback door has released and fully swung open...

 ...and here is where the dart ends up. Remember, the goal here is to get the foam jammed into the bolt as far as possible, since the more pushback distance, the greater the effective barrel length and the less dead volume.

 So here is the USD...

...And here is where it ends up.

There were some predictions of problems, but none are to be found. The suction darts pushed back exactly like domes, perhaps even a bit farther. No reliability problem occurred here either despite the flexible rubber suction cup getting hit by feed system parts.

 Now here are 2 strange notes on the packaging.

One is a warning concerning the service life of darts when used with "motorized blasters" which I am left to assume refers to flywheel launchers.

The other is an instruction to fire "at distances greater than 10 feet" to achieve "best performance". This likely relates to firing these suction darts at smooth surfaces and expecting them to stick.

So what are the ramifications here?


Well, for one thing, the latter warning is a bit of an excuse. As suction darts these things are abysmal. I fired them at a variety of flat surfaces which have formerly retained suction micros well, and only a few stuck regardless of the velocity. Most of them bounced, and bounced quite energetically. The combination of the greatly reduced tip area versus the outgoing micro and the greater muzzle energies of the modern era guns really kill the fun of suction tips. So, that's out of the way I guess. Do not buy these if you want suction darts. If you want a replacement for the Nerf suction micro, buy Buzzbee micros instead - although there is no substitute for the real thing, and your best bet remains NOS Nerf suction micros. Bit of a shame really.


Now that other flywheel bit is somewhat perplexing. It is difficult to say what is meant by "life" in this case. Perhaps this only refers to the suction tip's functional life. However, it is logical that the rebated tip design would accelerate foam wear.

Remember this?


In a dome-tipped streamline, the rubber takes some of the hit from the flywheels. In the USD, it is the front edge of the foam alone. Perhaps that burndown zone wears faster with these. Perhaps it wears faster with "stocker" guns then with domes. There was a Rapidstrike equipped with Blades in the test lineup and it did inflict so-called "scorched earth" effects on each and every one of the tested USDs as it hammered out some nice velocities. Whether it really is faster will be addressed in the follow-up post - but it did seem worse with these.


And here is the chrono session data.

A parallel test was performed with new, A-code Elite Standards as a reference point.

The representative battery of launchers:

Basic 100-120fps Retal build covered medium-velocity stock-barreled springers, BIB breech reliability and a barrel extension test platform.

An AR-deleted stock spring EAT provided a low-velocity counterpart.

A Z100 and a ~150fps NF (not shown) covered cylindrical barrels.

Strongarm represented revolvers with "weak" cylinder sealing. Also, as seen before, it acted as a consistent and generic dart durability reference point at beginning and end of session.

RS (the swarm was not used in the test) covered high-velocity flywheels.

The Rayven was not usd in the chrono session but was used in some mag reliability tests.

Triad represented stock barrels with ARs.


The conclusions

The USD showed no significantly anomalous behavior.

Velocities in many cases increased slightly. The USD seems to be a lower mass than the Standard Elite though I can't verify that at the moment.

Durability in springer use appeared to be on par with other darts, perhaps only slightly worse (though due caution about limited sample size applies here). After all the abuse of repeated firing into the backstop, loading, flywheels and high-velocity springers, the Strongarm reported just under a 2 fps average loss for the USD and just under 1 fps for the A-code.

Performance with long barrels was found to be questionable. Whereas the A-code easily punched out 154fps with the NF, the USD hung around 150, even as velocities elsewhere increased. Once again, mention must be made of sample size but it does appear efficiency is reduced with long barrels. This is most likely due to the longer core length of the USD - while I did not dissect one, the tip has a longer core, and as with Streamlines and their allergy to barrel length > 2.5" this is expected to cause increased barrel friction by "blocking" part of the foam from exposure to chamber pressure so that it does not compress.

Flywheel velocities skyrocketed. This has not been seen before in similar-mass darts, and the rebated tip design should be working against it, but the RS numbers tell the real story. The core length may be to "blame" here as well.

As to reliability, well, nothing happened that caught my interest. One of the new stiff A-codes misfired from the Strongarm on its first shot. None of the USDs malfunctioned any of the guns at any time.

A worst-case mag test with the rounds shaken forward to let the tips scrub caused no trouble. In general these appear to be insensitive to loading versus domes.


What remains to be seen

The accuracy and range worries, of course. And taking things out of the lab into the ambient environment. Of course. No recommendations yet - but stay tuned for the follow-up post once these get some kind of field action.