
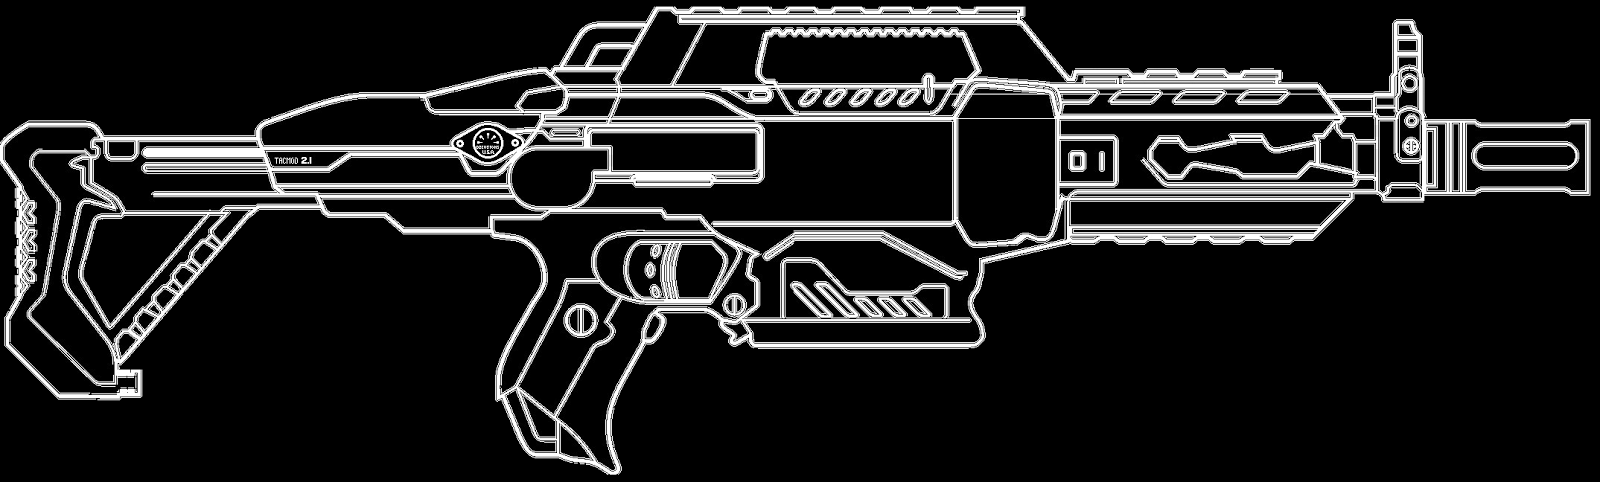
The concept 3.1 eliminates the carry handle in favor of a full length top rail. This gives a bit more modularity and is a bit more friendly to optics. Additionally, all nonstandard Hasbro rail segments are to be replaced with Picatinny (MIL-STD-1913).
Next car in the Picatinny train will be to develop Picatinny conversions for the carry handle equipped 2.1. The 2.1 is the gun you guys know, the one you have probably been hit by if you play TBNC or Florida Polytechnic HvZ:
Or at least, that is the prototype, which is a work in progress itself. Recently, I finally got around to repairing my charge connector hack once and for all, and with all balance wiring properly separated from the charge current path and a new charge cable made up to match, it charges and balances like a boss.

Other in-progress product improvements, some of which are going into the 3.1 build for my new primary:
- Add an external ATC plug-in fuse for the pusher circuit. If a crash occurs, the sustained stall current blows the fuse, motor is spared and a new fuse restores combat effectiveness instantly.
- Add a permanent, high-strength sling mount to the receiver which is compatible with common slings such as the Magpul MS2 and MS3 and is in the proper location for singlepoint use.
- Increase trigger and cycle control switch ratings.
- Revise cycle control options. A misbehaving switch in the Vulture project raised an interesting possibility of "dead-center" cycle control which should greatly improve the stability of the system. The dead center circuit is nothing more than cutting the positive wire to the cycle control switch, giving it authority to brake, but not power, the motor. A runaway or unintended trailing shot is physically impossible.
- Revise ROF options: Is 10rps optimal? Can XP180 pusher motors and/or deadcenter FCGs make higher ROF as controllable?
- Make the 1600mAh Sony US18650VTC3 the standard cell for the Tacmod battery since the 1300mAh Sanyo UR18650SAX is obsolete and the Sony is better. This also has 2 high-capacity upgrade options (the 2100mAh VTC4 and the 2500mAh VTC5) available.
- Experiment with Stryfe flywheel cages. For one thing, 180 motor installation is easier and requires no modification. For another, the spring feed guides - can they be reliably used and will they boost accuracy?
Here are most of the upgrade parts and goodies for this project:

Top to bottom:
- 3 x Xtreme Production Pro180 Motor
- Magpul MOE 9 slot polymer rail segment (for underbarrel)
- 2 x Sony US18650VTC3 (for pack build)
- 2S balance pigtail (for pack build)
- Deans (for pack build)
- DIN connector for charge port
- Offset 25mm flashlight mount
- Aim Sports 12" x 0.31" aluminum rail segment (for top rail)
Here are the XP180s.

Look how strong those magnets are.

Flashlight mount demo with Convoy M1 which is going to be my weapon light

Fits perfectly. No more duct tape!

Reviews/links on all of the stuff coming later. All the rail hardware was super, super cheap for what it is and you betcha I am going to be posting specifically about rail section sourcing and use.
I still need a Stryfe cage and fly set, and I am eyeballing 10.1A Omron submini levers for the FCG build. After seeing the BSUK kit, I will be using a plastic follower similar to that design, not a roller like in the old prototype.
This is going to be an awesome journey. Build posts coming soon. I promise I will take my time and be as clean and careful as I can with this particular build at every stage. Nothing will be spared, I am determined to end up with superstock defined and incarnate in a single piece of equipment when I am done.
Really like the design concept for the revisions. Should look superb!
ReplyDelete